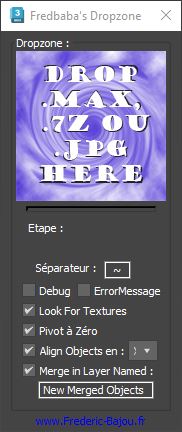
Dropzone

The Dropzone script streamlines importing assets into your 3D scenes. Simply drag and drop a 3D file, image, or archive from your library onto the script. It automatically decompresses archives, imports or merges the 3D object, locates textures in subfolders, groups and renames objects as needed, positions the pivot point at the object’s base, and places it in the correct layer. Managing and importing your assets has never been so efficient.
To maximize the efficiency of the Dropzone script, organize your 3D object library as follows:
Compression: Compressing your 3D files (using 7-Zip) can significantly reduce storage space (6-10x). A provided batch file simplifies compressing all .max files within a folder individually. (7-Zip must be installed on your computer for archive handling.)
File Structure: Each asset should reside in its own folder. This folder must contain either:
A single 3D model file (any format 3ds Max can open).
A single archive file (any format 7-Zip can open) containing only one 3D model file with the exact same name as the archive.
Textures: Place all textures for the 3D model within a subfolder named « texture, » « textures, » « map, » or « maps. »
Previews: If using multiple preview images for a single 3D model/archive, name them identically to the 3D file, using a separator (e.g., model_name.jpg, model_name_detail.jpg). The part before the separator must match the 3D file name.
Optional Hiding: For a cleaner library view, you can hide the texture folder, 3D files, and archive files, leaving only the preview images visible.